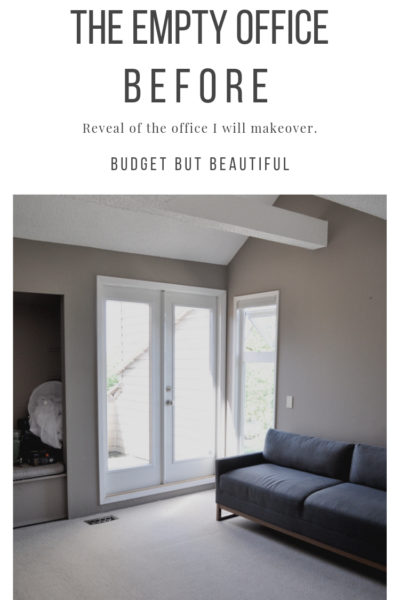
 I am so excited to reveal the Budget Bedroom Makeover! My friend Stephanie recently moved into a new apartment, which is a lovely 14th floor apartment with a lot of light and a great view. Her room didn’t really reflect the rest of the airy apartment. It had a built in desk and a murphy bed. Everything in the room was a different colour of brown and didn’t help the room shine. With all of the built ins a lot of the light was blocked as you see in the photo above. The space didn’t really flow and needed some help to create the sanctuary that Stephanie was looking for in a bedroom makeover.

how to use pinterest to start on your bedroom makeover
The photo above is not the best quality, but it was one our inspiration photos for the room. The first step to creating the bedroom makeover was connecting. Stephanie and I had a quick chat about what she was looking for, an airy and white bedroom on a budget. I can do that!
1. Create a pinterest board
After we chatted I created a Pinterest board and starting pinning some ideas from what we discussed. The Pinterest board was great for inspiration and colours but wonderful for shopping!
2. pin inspiration photos
After you have your Pinterest board created start pinning rooms that have a similar vibe, colour scheme and room design. This will help to start searching for pieces to add into the room
2. Pin photos of items you’d like to purchase
We pinned the links of the items we really liked so when we were in store they were easy to find. You would be surprised how many times we looked at our Pinterest board during our shopping day! I would highly recommend this is you are looking to create a space. Pin your inspiration photos first and once you start looking for actually pieces to incorporate into the space, pin the link to the item online.
 After we were finished with the shopping it was time to bring all the pieces together! It took us a full day but it was worth it. I really liked shopping on one day and then setting up on the second day. Shopping can be exhausting and you want to make sure you are in the right mind set when you start to put your room together, plus you’ll need lots of energy! Above you can see the area where there was a built in, this is where the bed was going to go, to allow a nice wall for the shelves above.
 Here it is, the bedroom reveal! Can you believe this is the same room. Basically the room was stripped down, built ins removed and walls painted white to brighten up the space. I am so happy with how this turned out. The shelves bring some colour and texture to the space, so it was not fully white. The small side table with candles, add extra storage and a nice little touch to the side of the bed.
 This area next to the patio was going to be the space for the desk. As this room is extremely small we had to create little areas for everything Stephanie needed. There is the bed space, the desk, a tv with stand and the closet. It all flows together, but each has a focus to separate it from the other.
 The after! I can’t believe how much it has changed! It doesn’t even look like the same room. This is the view you see as you walk into the room and I want to say this little corner is my favorite. The desk looks so inviting and the light spilling in from the large windows makes it a space you want to hang out in.
 The closet, now this took some convincing. Stephanie was unsure about the open concept of the closet I totally understand, it’s comparable to open shelving in a kitchen, it doesn’t take long for it to be messy. What we did to help Stephanie was purchase a bed with storage drawers on either side, a TV stand with storage and the baskets on the shelves so she could hide the items she didn’t want out on the shelves. I think the open closet really works, it helps keep the space open. What do you think, open closet? Or should we have added doors?
 I love how Stephanie can use the shelves to display her current favorite items, like these hats for spring. It’s a fun way to update the décor a bit throughout the year.
 For a bit more storage we also used this bookshelf next to the bed. It is not taking up valuable square footage, but it is adding a lot of storage for books, journals and a few candles. Items like these shelves are great to add to a part of the room that doesn’t have traffic and won’t take away from the square footage.
 As the room does not have any overhead lighting, we added a few lamps. Again this lamp is larger but doesn’t take up space as it’s on the wall where the door opens and fits perfectly there. I loved the idea of using a small table instead of a conventional side table, it is more open but Stephanie still has a place for all her items at the end of the day.
 There you go! Stephanie’s Budget Bedroom Makeover. What do you think? I think we used all the space efficiently, created a brighter room and somewhere Stephanie will want to spend time and not simply a place to crash at the end of the night. All of the little details on the shelves really help bring the room to life. We used the prints Stephanie had collected from various places and found different frames to match, then pieces of storage incorporated onto the shelves and the small pieces of decor.
 Do you remember my $300 Bedroom Makeover from last year? It was one of our most popular posts and definitely worth checking out. It is possible to create a Budget but Beautiful space on a budget!
A Plentiful Life affordabl makeover Affordable Decor affordable room revamp affordable space Apartment Therapy Bedroom Decor bedroom makeover bedroom revamp bedroom reveal bedroom updates Before and After bright bedroom budget bedroom makeover Budget but Beautiful budget room update Decorating diy DIY House diy network DIY Room hgtv Home Reno Show my diy home New Bedroom Room makeover show Room Revamp Room Update Small Budget Small Space small spaces small budget Tijana Popovic white bedroom


